By AppsHive Team
With over 3.5 million apps and over 2 billion Android users, Google Play Store is undoubtedly the biggest app distribution platform in the world. Thus, if you’ve developed an app and want to reach a wider audience, it makes all the sense to publish your app on Google Play Store.
However, submitting an app to Google Play Store might not seem straightforward for someone who’s not used to submitting apps to various app distribution platforms. Don’t worry; we’ve got you covered.
In this blog post, we’ve outlined 8 easy steps to help you publish your app on the Google Play store.
7 Steps to Publish Your App on Google Play Store
We know the haunting thoughts one may get while planning to submit their app to the Android Play Store.
From registering your developer account and merchant wallet to integrating them and uploading the Android package kit for listing your app, we will cover everything right here. Let’s get started!
If you plan to launch your iOS app, we can help you learn how to submit the app to App Store as well.
Step 1: Google Play Console
A developer account is a must for submitting apps to Google Play. The Google Play console is a backend platform that allows developers to submit apps to the Google Play Store and manage them for a fee of $25. Developers can make an account and use numerous control features. After registering, the developers can submit your application to the Google Play store without fees.
Step 2: Setting up Google Merchant Account
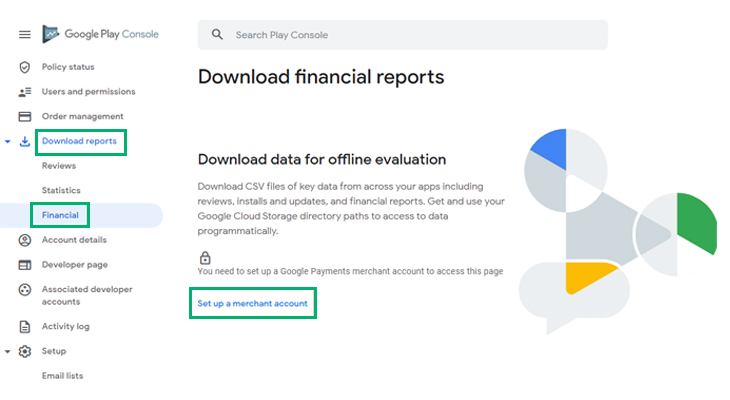
You will need a Google merchant account for managing sales, whether you have decided to sell it as an in-app purchase or paid app. You can go to the Download reports from your Google Play Console and click Financial. Setting up a Google Merchant Account is needed to access this page. Click on Setup a merchant account to create one. Upon creation of the Google Merchant Account, it is automatically linked to the Google Play Console, so now you can control, review, and download all your financial reports.
You will need a Google merchant account for managing sales, whether you have decided to sell it as an in-app purchase or paid app. You can go to the Download reports from your Google Play Console and click Financial. Setting up a Google Merchant Account is needed to access this page. Click on Setup a merchant account to create one.
Upon creation of the Google Merchant Account, it is automatically linked to the Google Play Console, so now you can control, review, and download all your financial reports.
Step 3: Create the App
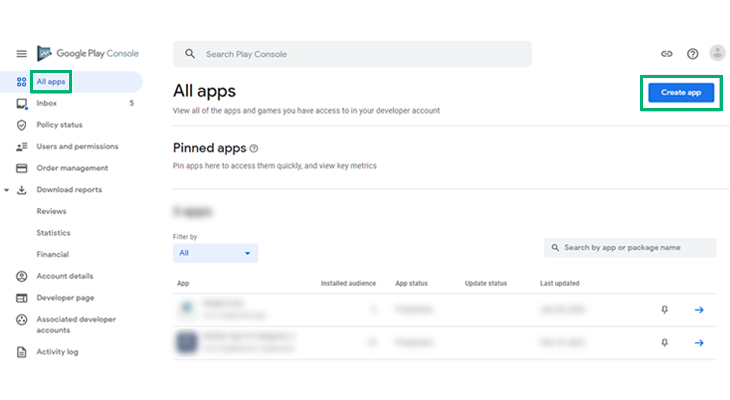
This is the step where the process for submitting your app to Google Play begins. First, from your Google Play Console, you must select All Apps from the left menu and click on Create App.
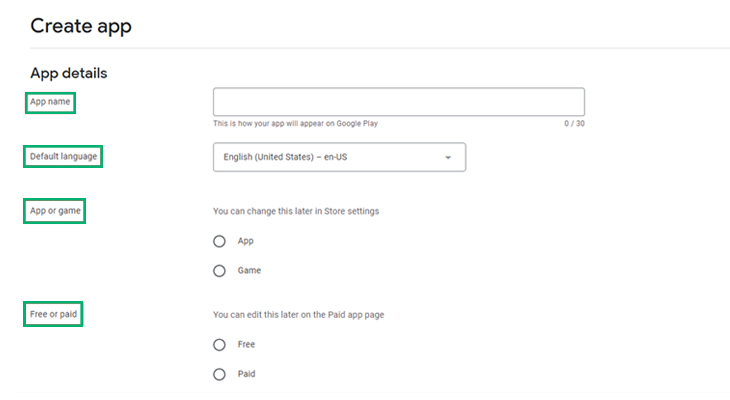
When creating an app, you must fill in certain details about it. It includes:
- App Name - Though you have already entered the name of your app, you can change it if you wish.
- Default Language - From the drop-down menu, select the language you will use for your app.
- App or Game - Choose whether your app is an app or a game. Note that this setting can be changed later too.
- Free or Paid - Here, you have to mention whether your app will be available free or the user must pay an amount. Again, you can update these settings later on. However, this flexibility applies until the app is published. Once it goes live, you cannot change it from free to paid.
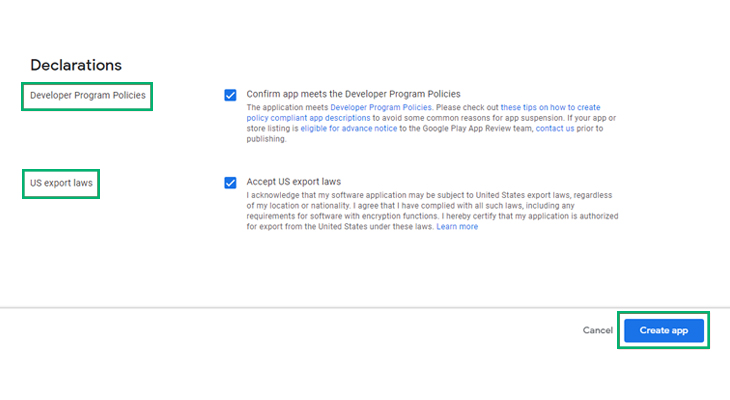
After filling out the details, Google Play Console will ask for affirmations from you. First, you must ensure that the app matches the Developer Program Policies and adheres to US export laws. After this, click on Create App.
Then Google Play Console asks for affirmations from you. First, ensure your app matches the Developer Program Policies and US export laws. Then, click on Create App.
Step 4: Set up Store Listing
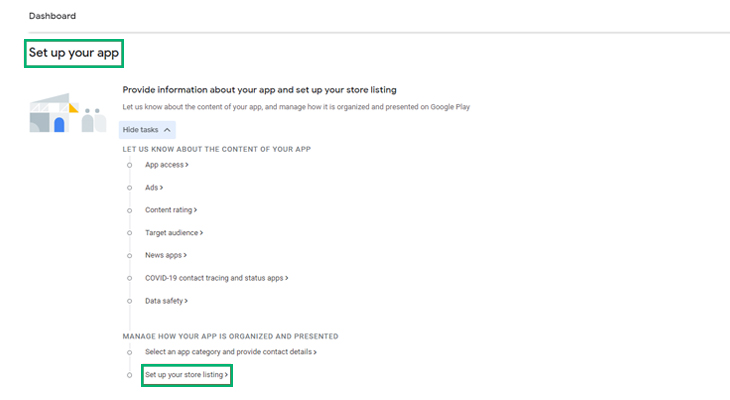
You will be directed to the app dashboard when clicking Create App. Expand the setup your App option' and opt for 'setup your store listing.'
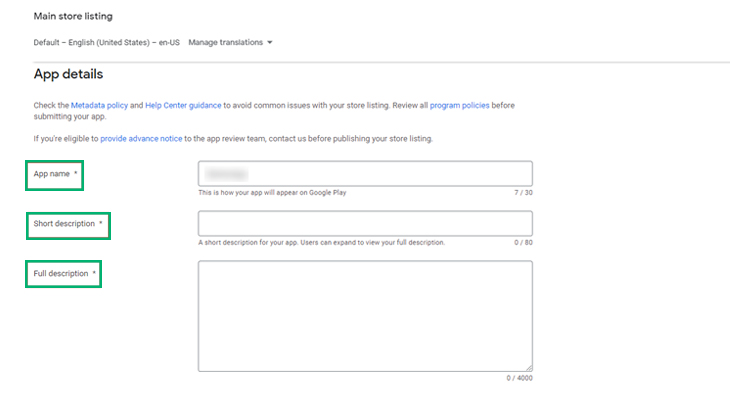
Under App Details, you have to enter the details about your android app:
App Name - You have already entered the name, but if you wish to change it, you can now.
Short Description - Enter a short description for your app of up to 80 characters.
Full Description - Give an explanation of your app within 4000 characters for your app with targeted keywords to help Google show your app to the relevant audience.
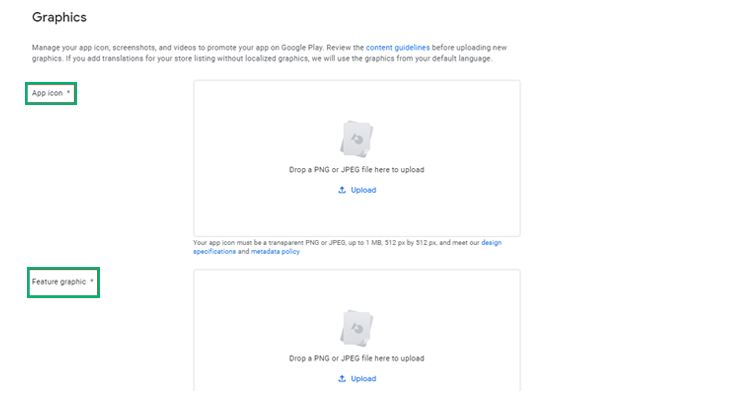
Under the Graphics section, you can put up the app icons, video, feature graphics, and screenshots.
App Icon - Here, you can upload a picture that users will see as your app's icon. While uploading, ensure the picture complies with the set size limit.
Feature Graphic - This is where you add an image for your app for promotional purposes.
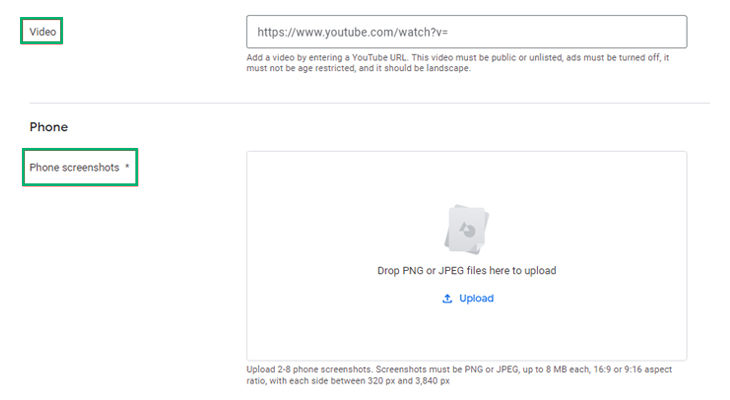
Video - Here, you can add a YouTube link for the video of your app. It also comes with some terms and conditions, so make sure you publish your video on Youtube based on that.
Phone Screenshots - In the screenshot section, you can put a minimum of 2 and a maximum of 8 screenshots for mobile phones. However, follow the size limit and aspect ratio.
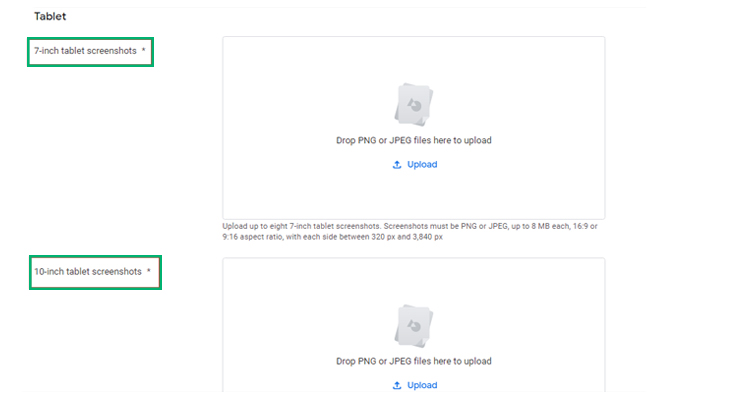
7-inch Tablet Screenshots - For a 7-inch tablet, you can upload up to 8 screenshots but keep in mind the size limit and aspect ratio.
10-inch Tablet Screenshots - For a 10-inch tablet, you can upload up to 8 screenshots.
Once you are done with uploading details, click on the Save button.
Step 5: Content Rating
Content Rating is the next and most important step; otherwise, it will be considered an Underrated app. So Google Play Store might remove it from its platform. So the step is quite important.
Set up your App from the App Dashboard, and select a Content rating.
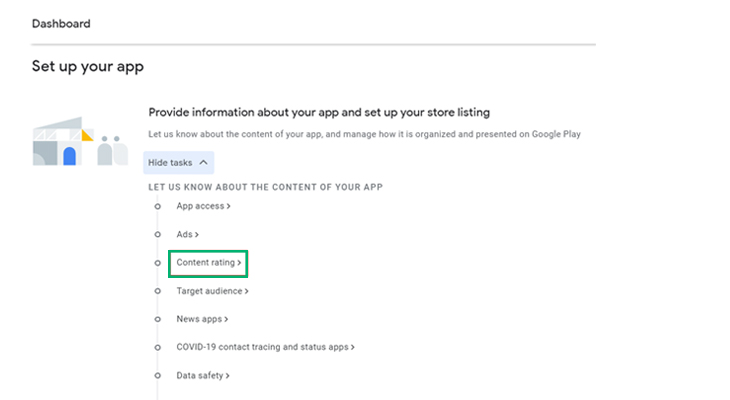
Click on the start questionnaire.
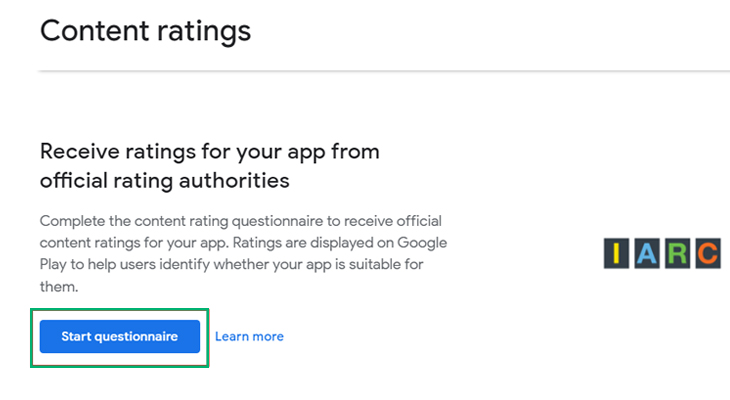
The first section in the category is the Content Ratings menu.
Email Address - Put the email address that people can use to get in touch with you.
Category - Select your app category.
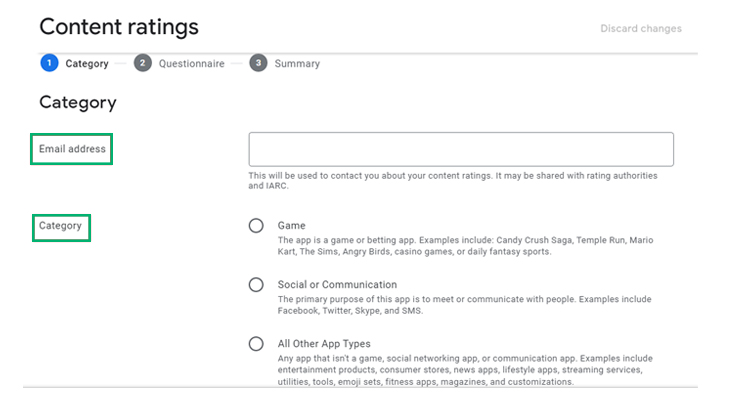
Click on Next, and Google Play Store will ask you a few app-based questions. Answering these questions will allow Google Play Store to get more ideas about your Android app.
After doing all the above, you will be shown the Summary of the ratings. After this, you can Submit to save the changes.
Step 6: App Pricing
This step involves mentioning whether you intend to make the app free or paid. If you are opting for paid, set the app pricing. Under the Monetize section in the left menu, you can do it by going to the App pricing.
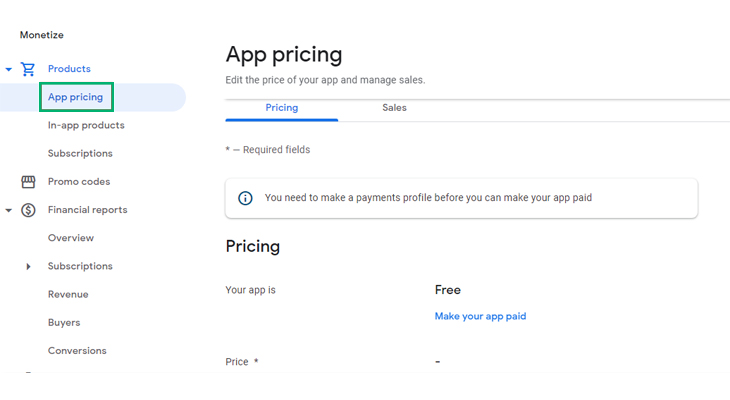
Note that you can change a free app into a paid one, but vice versa is not applicable.
Step 7: Upload App Bundles or AAB Files
This is one of the fundamental steps. Then, finally, submit your app file to Google Play. Here you will determine whether or not you wish to release the internal, alpha, beta, or production testing.
To do that, go to the suitable section via the App dashboard, and select Create a new release:
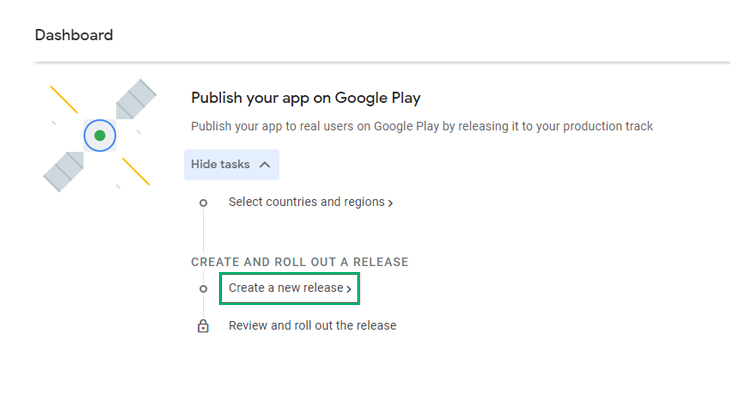
Select Create new release.
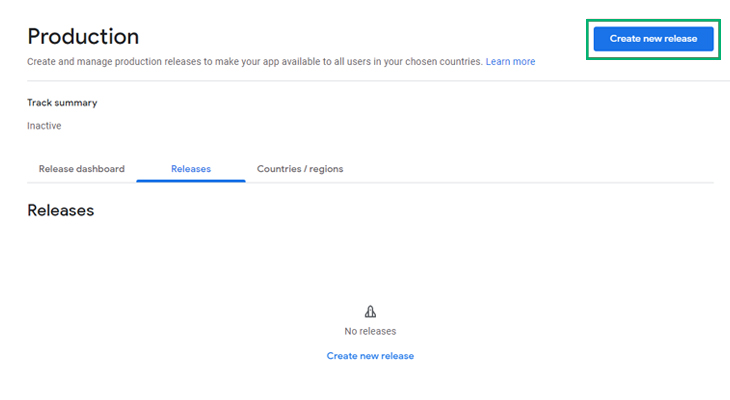
You can now upload the .AAB file of your app and add the details of your Release.
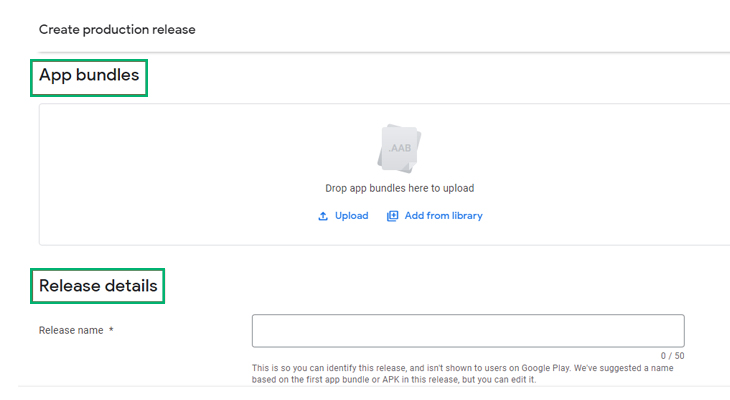
After filling in all the details, check for all errors and correct them. After doing this, you can start the rollout release for your app.
Voila! Your app is ready to be reviewed by Google Play Store. It takes up to 7 days to receive approval from Google Play. After receiving approval, it will be available for download.
Congratulations! Market your app and get it trending around the world.
Conclusion:
You now have one of your own among the millions of apps on the Google Play Store. However, if any problem persists, we are here to help. If ever you have any questions regarding how to upload the apps on Google Play, you know where you will find the solution.